Previous: Using Qemu from the command line
Using AQEMU for Virtualization
[Editors Note: Both QEMU and AQEMU are projects under active development. The instructions in this section are known to work with QEMU v. 0.11.1 and AQEMU v. 0.8.1. There may be slight differences in the screen layouts in some versions, but the essential functionality should work as described below.]
Boot the system and become the superuser. Before installing a guest operating system, it is necessary to load the aio kernel module as follows:
# kldload aio
Since the X Window system is already installed, you should be able to type startx and have the system bring up the X Window system and the window manager selected in your .xinitrc file. If you do not have a .xinitrc file the system will load a default configuration with the twm (Tab Window Manager- the default window manager supplied with X) as shown in Illustration @@@@. Information on using twm is available from many Internet sources. Check for further information and sources.
You may already have FreeBSD installed with another window manager, such as KDE or Gnome. The choice of a window manage does not affect the remainder of the tutorial. We will use the fvwm window manager for these diagrams.
Illustration 16: Default X Window Startup Screens
Type aqemu to start the AQEMU application, as shown.
When aqemu starts, there are some initial housekeeping and configuration settings to perform as shown in Illustration 16.
Illustration 16: Initial AQEMU Settings Screen
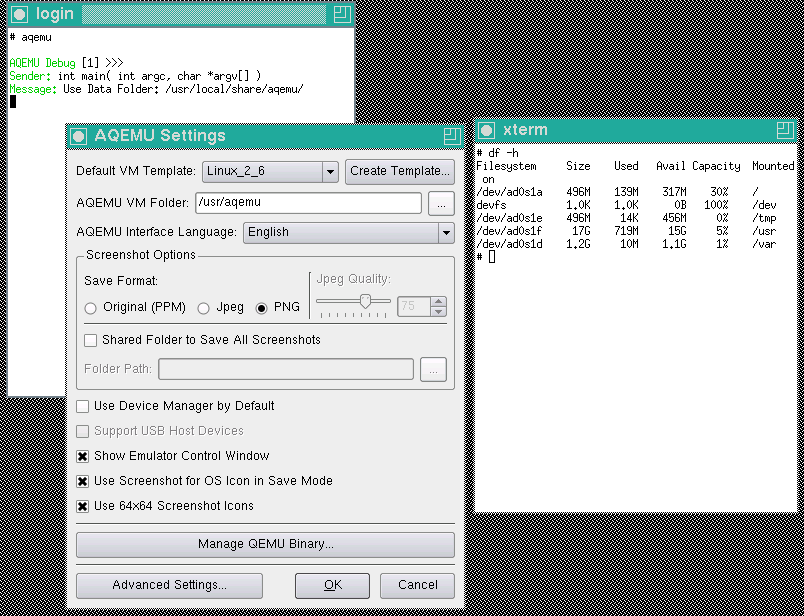
Note the AQEMU VM Folder setting, which has been changed from its default. It's not important where this directory is created, as long as it has plenty of disk space available to hold the virtual machine disks that will be created later. In this case /usr/aqemu was chosen because the /usr filesystem has a lot of free space.
Also note that there are some debug logs written to stdout on the terminal window. These are mostly for the developer, but they sometimes have important information when you are trying to solve problem with AQEMU or QEMU. For now, they can be safely ignored.
Click 'OK' and proceed to the main AQEMU screen shown in Illustration 17.
Illustration 17: AQEMU Main Screen
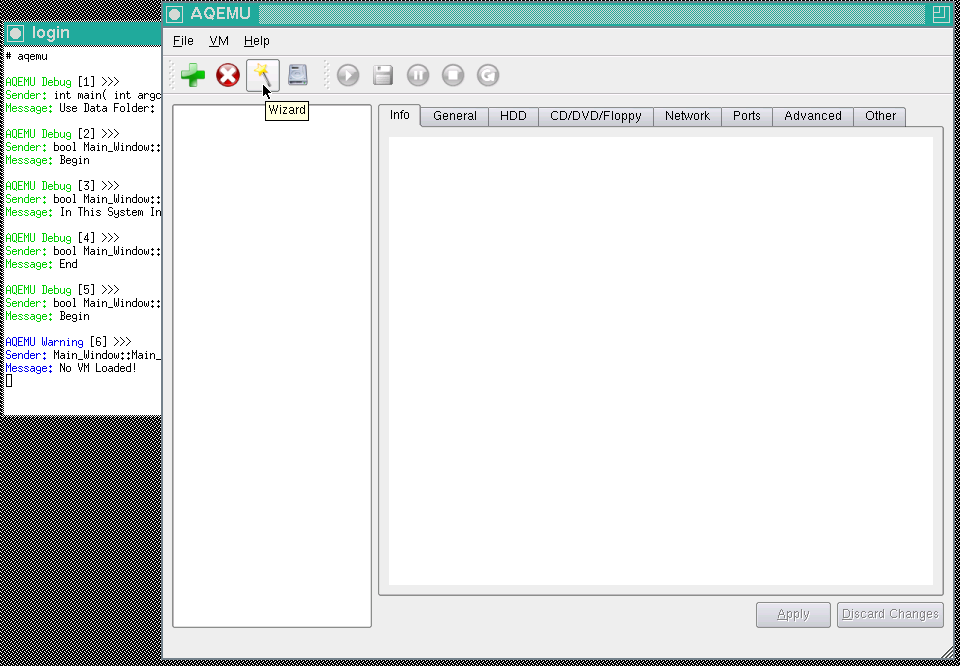
The frame on the left side is the VM inventory (currently blank) and the frame on the right contains several tabs that have important configuration options. We will cover these options shortly.
There are several ways to create a Virtual Machine in AQEMU. The method we will use is to use the 'Wizard'. Clicking the Wizard icon as shown, brings up the initial Wizard Mode screen. Select 'Typical' and then 'Next'. This brings up the 'Template for VM' screen shown in Illustration 18.
Illustration 18: Template for VM Screen
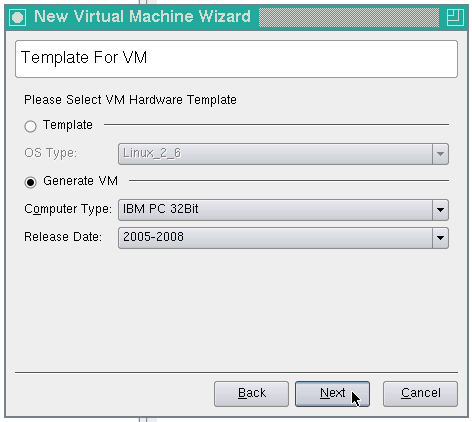
Select the 'Generate VM' option and the other options shown, then click 'Next'.
The next three screens are self-explanatory. Click 'Next' after each selection.
Virtual Machine Name – Input a name for the VM. We chose OpenBSD4.x. AQEMU was intelligent enough to include the Puffy icon as shown below. Other icons are available, but there is no icon yet for DragonflyBSD.
Hard Disk Size – Select at least a 4GB hard disk size.
Network – Select the default 'User Mode Network Connection.
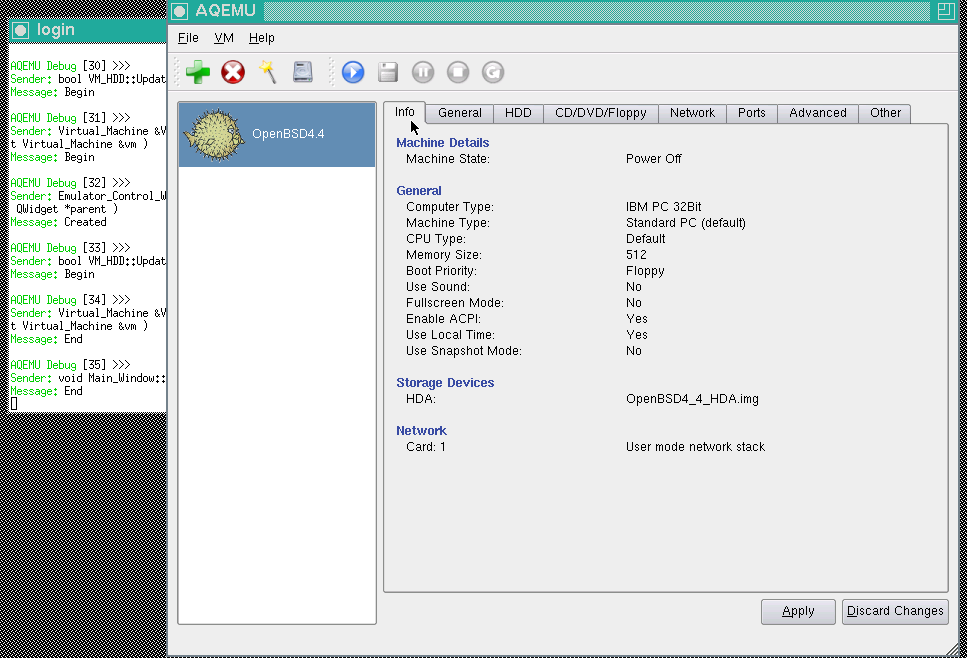
Once these are complete, the Main Screen reappears with the completed inventory as shown in Illustration 19.
Illustration 19: Main Screen Showing Newly Created VM
Before starting the VM, browse through the tabs. There are several changes that are needed. Illustration 20 shows some options on the 'General' tab. If you don't plan on running X Windows in the VM, 64 MB should be enough for any BSD, otherwise select at least 128 MB, or more.
Illustration 20: General Options Tab
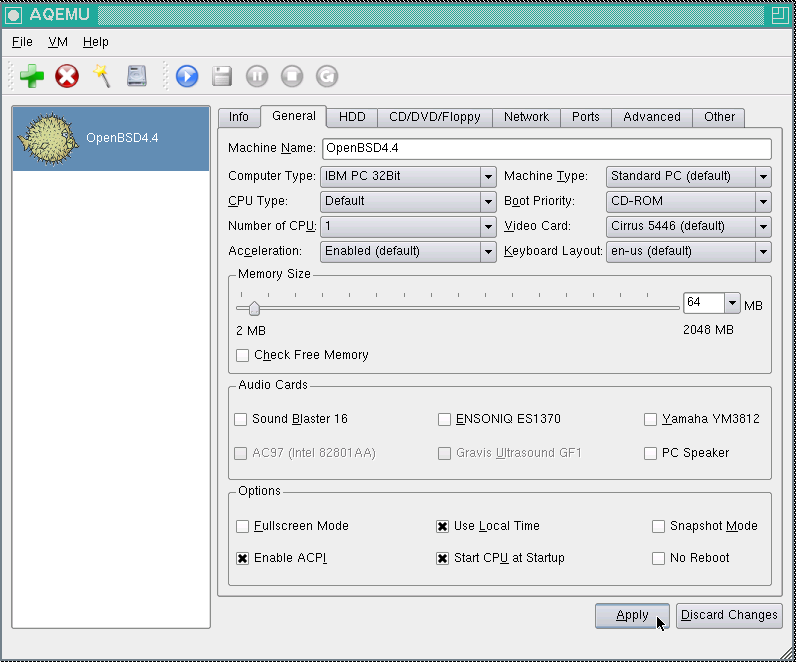
Remember to hit Apply button (as shown) after each change.
You also need to change the 'Boot Priority' to 'CD-ROM' before starting the VM for the initial installation. Once the installation is complete you'll have to change it back to the default 'HDD'.
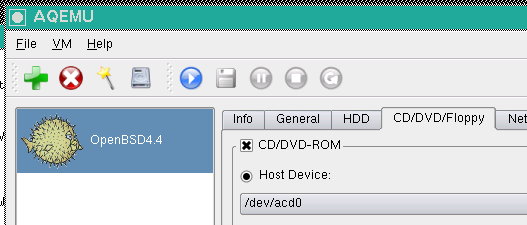
Next, select the 'CD/DVD/Floppy' tab and ensure that the options shown in Illustration 21.
Illustration 21: CD/DVD/Floppy Options Tab
If you are paranoid, click the Apply button one last time. Once all desired options are set, you can check the entire configuration on the 'Info' tab as shown in Illustration 22.
Illustration 22: Info Tab With Options Summary
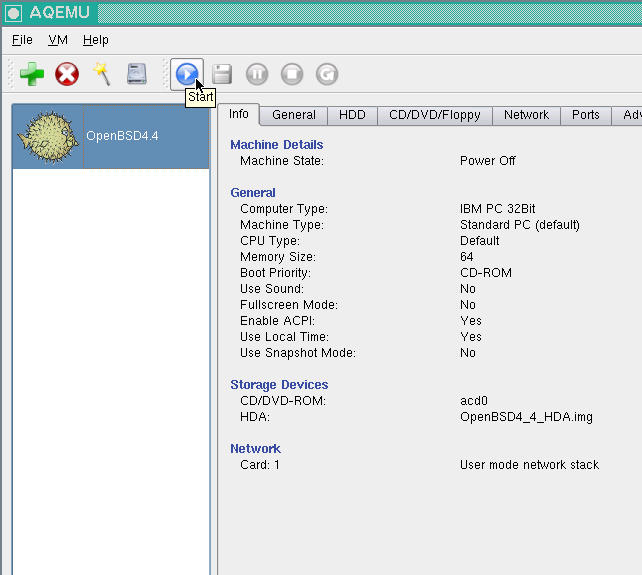
To start the VM, click the blue 'Start' button as shown above. AQEMU will launch two windows- a control window and the main VM window. The control window has several options to send signals to the VM, pause it, restart it, etc.
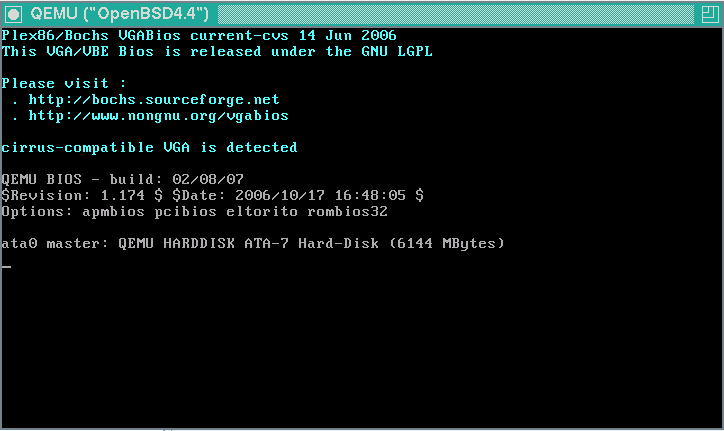
The main VM window starts up a console session as shown in Illustration 23.
Illustration 23: VM Startup Console Screen
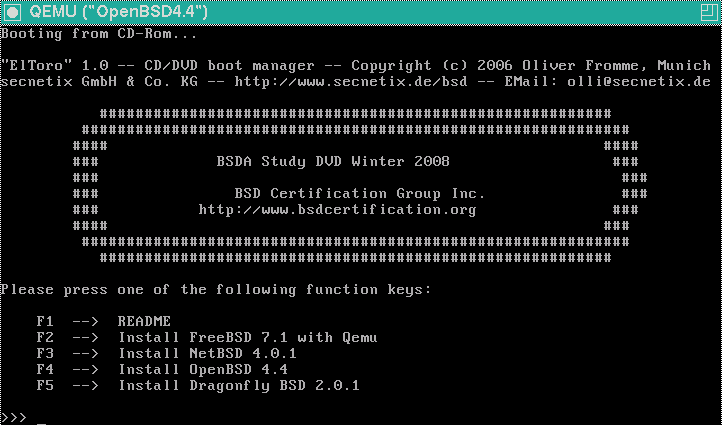
If the CD-ROM was selected as the boot device (as shown in Illustration 20), the system should bring up the BSDCG DVD as shown below, just as it did for your initial install. This time however, you're doing a virtual install.
Illustration 24: Booting the DVD From Inside the VM
Cursor Focus Control
Once the virtual machine (VM) has started, you will have to change the cursor focus into the VM window by clicking directly on the window. Once the focus has been “grabbed” by the VM you can use the keyboard and cursor as you would normally. [NOTE: To exit the grab press Ctrl-Alt. The cursor should return to the host system control. If you have more than one guest system running simultaneously, you may have to click on other exposed windows to get the cursor to 'fall' into a different guest system, or your host system.]
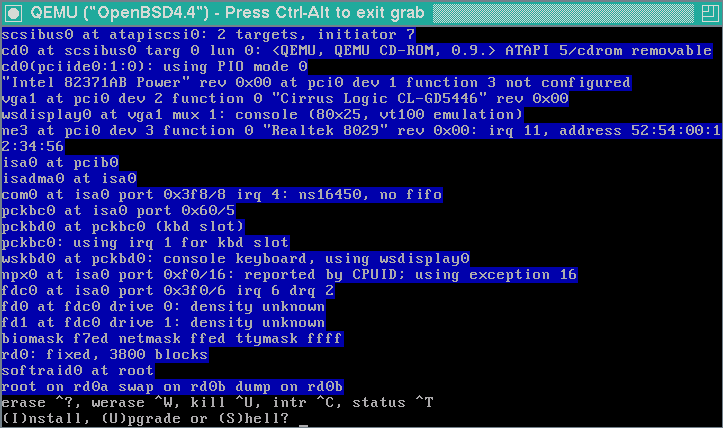
At this point, you should be able to select the appropriate option and boot a different BSD within the VM as shown in Illustration 25.
Illustration 25: Booting OpenBSD Inside the VM
Once the operating system installation is complete, halt the operating system as instructed, then exit the VM back to the main OS. You can shut down the VM window with the stop icon. Before booting the newly installed quest, you must reset the AQEMU 'Boot Priority' option on the 'General' tab to 'HDD'. This will cause the guest operating system to boot from the newly configured hard disk. See Illustration 20 for details.
When finished, start the VM with the start icon as shown in Illustration 22.
NOTE: OpenBSD is known to have a problem with the network drivers under QEMU. To use the default ne driver try the following workaround:
  config -ef /bsd
  disable mpbios
  quit
Reboot the virtual machine. the network should work correctly now There is a similar fix for NetBSD. Select option 4 on the boot screen (disable ACPI and SMP).
That's it! You should now be able to install all four BSD operating systems into QEMU guest Virtual Machines on your FreeBSD host system.
The next section will describe how to set up networking among VMs using FreeBSD tap and bridge devices.