Previous: Introduction
Installing FreeBSD with Qemu and Aqemu
Note: The instructions in this section assume that you intend to install the FreeBSD operating system on your computer's hard disk. All data will be erased from the disk. You should ensure that you have completely backed up your hard disk before proceeding with these instructions.
If you already have a working FreeBSD system, you can probably just install the QEMU and AQEMU packages and proceed to the next section- Using QEMU and AQEMU for Virtualization. The instructions in this document assume FreeBSD 8.2, QEMU 0.11.1 and AQEMU 0.8.0.)
To proceed with the installation, prepare your host system as follows:
1.Obtain the BSDCG BSDA DVD (Fall / Winter 2012 or later)
2.Place the BSDA DVD in your system and configure your system to boot from the DVD.
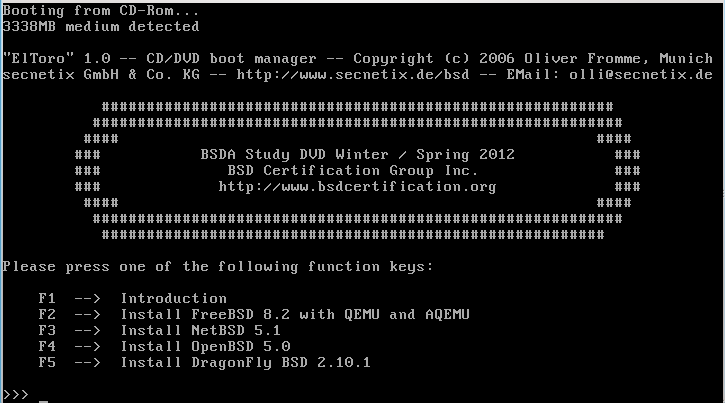
Illustration 1 shows the initial DVD boot screen. From this screen it is possible to boot any of the loaded BSD systems. For this tutorial we will boot and install FreeBSD the hard disk along with the QEMU and AQEMU packages.
Illustration 1: Initial DVD Boot Screen
To boot FreeBSD select the indicated funtion key (F2 in the above example). Illustration 2 is then shown along with specific details about the boot process.
Illustration 2: FreeBSD Boot Selection Screen

Pressing 'B' proceed to the actual boot loader shown in Illustration 3. Pressing any other key returns to the initial DVD Boot Screen shown in Illustration 3.
Illustration 3: Booting from the DVD

Once the operating system is booted, the initial sysinstall menu is shown (Illustration 4):
Illustration 4: FreeBSD sysinstall Main Menu
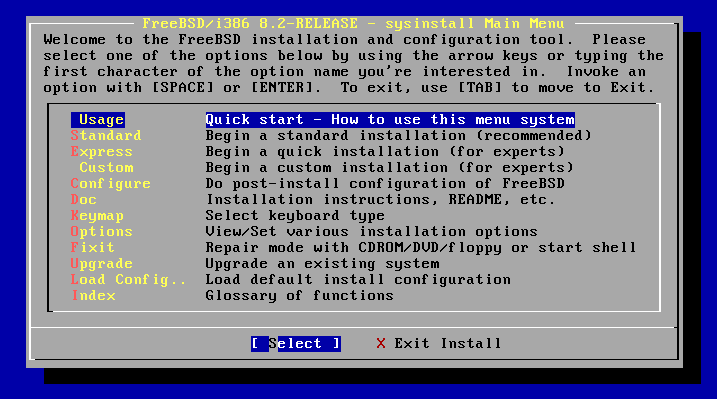
Experienced FreeBSD admins and users will probably choose either the Express or the Custom option to begin their install. For this tutorial we will proceed with the Standard option.
Once the Standard option is selected, proceed through to the FDISK Partition Editor as shown in Illustration 5.
Illustration 5: FDISK Partition Editor Screen
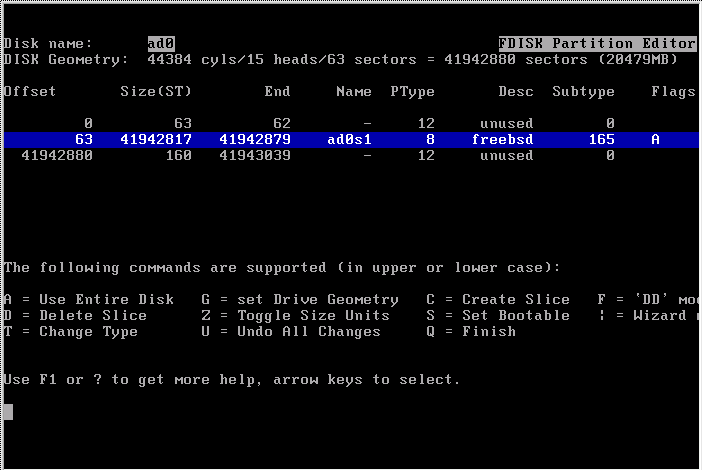
Select your choice of disk partition options. The options shown in Illustration 5 show the entire disk allocated to FreeBSD, and that partition has been selected as the boot partition ('A' flag). Once completed, select the 'Q – Finish' option. Note that there is no changes yet to the physical disk. All the physical changes are made at a later step.
The next important screen is the FreeBSD Disklabel Editor shown in Illustration 6.
Illustration 6: FreeBSD Disklabel Editor Screen
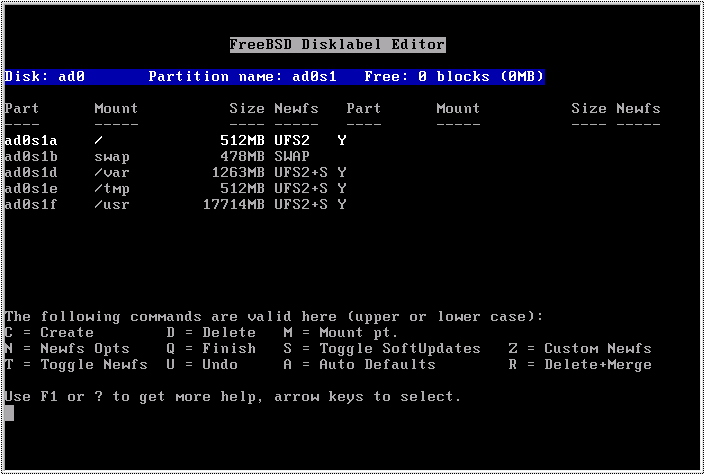
Again, there are many variations on how to set up a disk for use with BSD systems. The selections shown are the default options those created by selecting the 'A – Auto Defaults' option. Once the selections are set, select the 'Q – Finish' option to continue.
The next important selection is the choice of what distributions to install. This is performed on the Choose Distribtions screen shown in Illustration 7.
Illustration 7: FreeBSD Choose Distribution Selection Screen
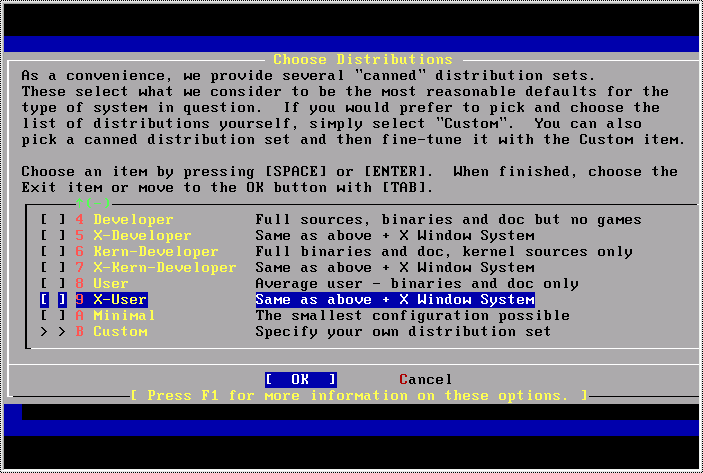
For this tutorial, you can select either the 'X User' selection, or the Minimal selection. If you select the Minimal option, you will still have to install some X Window options at a later time, but if you are short on disk space this may be a valid option. The tutorial will proceed as if the X User option was selected.
Next, the installer will ask if you wish to install the FreeBSD ports collection- a comprehe nsive collection of applications that are available for later installation. This tutorial (including the later use of QEMU and AQEMU) does not need the ports collection installed.
The next important screen is the Choose Installation Media screen shown in Illustration 8.
Illustration 8: FreeBSD Choose Installation Media Screen
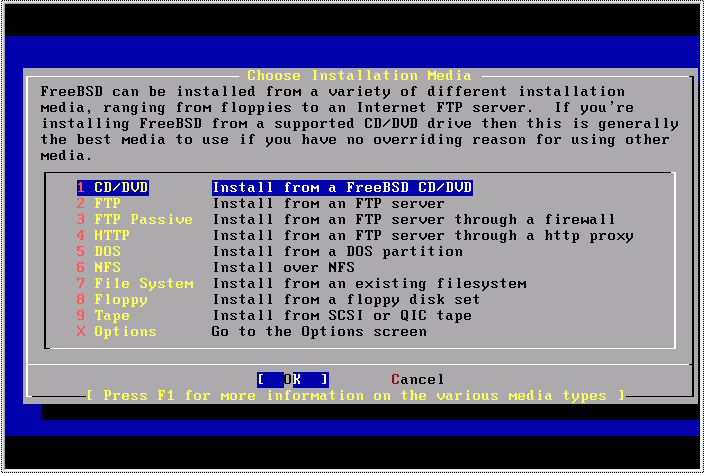
Select the '1 CD/DVD Install from a FreeBSD CD/DVD' option. The system will read the DVD to obtain the FreeBSD operating system and utilities.
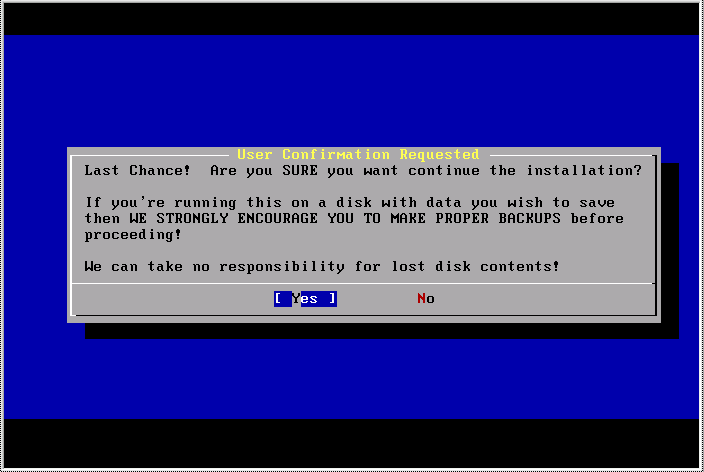
Finally, the installer presents the User Confirmation Requested screen and gives you an opportunity to confirm your desire to install the system. As shown Illustration 9, this screen notes that this is your Last Chance to back away from installation and preserve the contents of your hard disk. Select 'Yes' only if you are sure you wish to proceed with installing FreeBSD on your hard disk.
Illustration 9: FreeBSD User Confirmation Requested Screen
Once the 'Yes' option is selected, the installer formats the disk and begins installation. The operating system files are installed first, followed by all required dependent packages to support the type of installation selected in as shown in the User Distribution Selection Screen (Illustration 7).
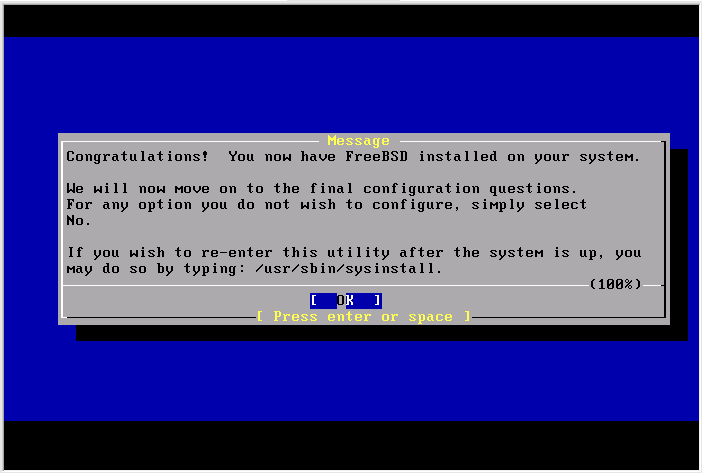
Once the installation is complete, the installer displays the Message screen shown in Illustration 10.
Illustration 10: FreeBSD Installation Complete Message Screen
At this point, the Standard installation continues on with several screens for various user configuration questions, all of which can be answered 'No' for now- Ethernet or SLIP/PPP devices; Linux binary compatibility; NFS client and server; etc.
However, Illustration 11 shows the package selection option screen which should be answered 'Yes' – i.e. we do want to browse some packages for installation.
Illustration 11: FreeBSD Package Selection Option Screen

Selecting 'Yes' proceeds to the Package Selection screen shown in Illustration 12.
Illustration 12: Package Selection Screen
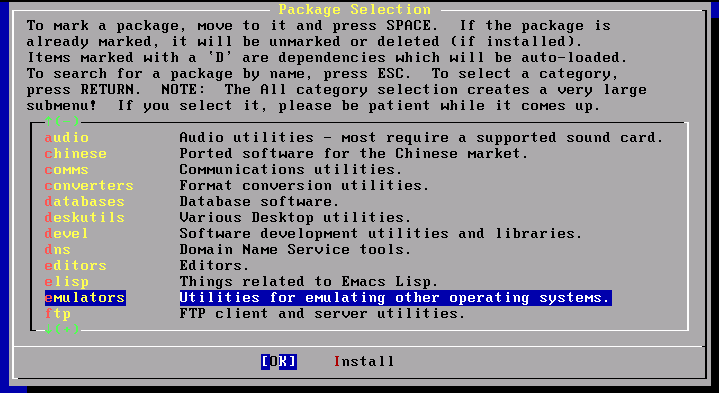
Scroll down and select the emulators – Utilities for emulating other operating systems selection. This brings up the emulators screen shown in Illustration 13.
Illustration 13: Emulators Selection Screen
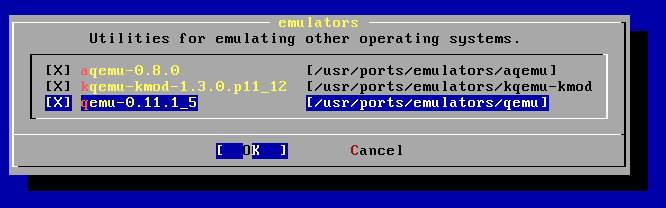
Select aqemu, kqemu-kmod, and qemu by selecting each line and typing the space bar. The installer will install all three packages. Tab out of the selection and press the 'OK' button. Continue by pressing 'Install', and confirming the selection with 'OK'. The packages will be installed as requested.
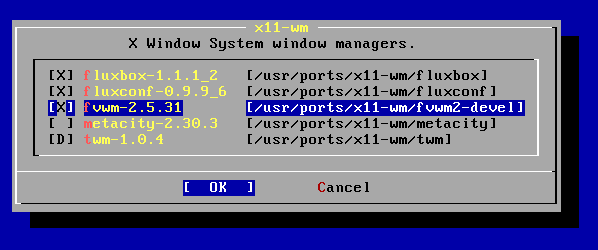
You should now proceed to the x11-wm X Window System window managers package category and select your desired window managers as shown in Illustration 14.
Illustration 14: X Window System Window Manager Selection Screen
There are just a few more housekeeping selections-
Set the root account password when requested.
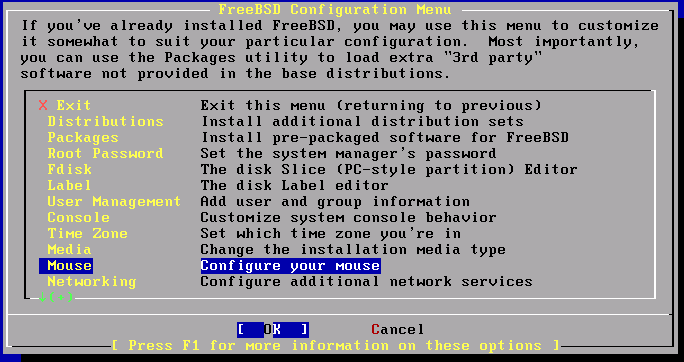
From the FreeBSD Configuration Menu select the option to configure the Mouse. Configuring the mouse here will simplify getting the X Window system to work. Complete the configuration by enabling the mouse, and adjusting the settings until you can see the mouse move on the screen. Having a working mouse is important to the remainder of the tutorial, so you should continue working through this step until the mouse is operational.
Note that with FreeBSD 8, you may need to put hald_enable="YES", dbus_enable="YES", and moused_enable="YES" in /etc/rc.conf if not already present.
Illustration 15: Selecting the Mouse Configuration Option
- If the 'Minimal' installation option was chosen earlier, you will have to select the the Packages option and install the 'X Window' (xorg) system.
At this point the FreeBSD system should be installed and ready for use. Exit out of the installer and reboot the system.